Loves of My Life


Jeremy and I don't have any kids yet so Pearl, our bulldog, is our baby.

We probably treat her too much like a baby. She is completely spoiled and I joke to Jeremy that we live on her schedule.
 

We got her around Christmas time in 2010.

You see, I had a cat named Joker who was the sweetest thing to me but to Jeremy he was the "spawn of the devil". Jeremy is extremely allergic to cats. He would come home and immediately his eyes would get red and his nose runny. It was not unbearable but it always uncomfortable for him. It didn't matter how much I vacuumed and cleaned the house, Joker's hair would be everywhere. So very sadly, I gave him away to a coworker's daughter-in-law. I knew he was going to go to a good home and that made things a little better.

Well, with Joker gone finally breathed easily again at home and after a while we decided to get a dog - a bulldog. I remember I was travelling for work when Jeremy and I finally made the decision to get a bulldog. We were looking at the breeders website together seeing the pictures of all the little puppies the breeder had for sale. We picked "Female # 2". Afer I came back from the trip, Jeremy and I drove up to Suphur Spring, TX and met our little stinker for the first time. There were so many cute puppies over there and the breeder had us play and see other ones in case we wanted to change our minds, but we had decided on "Female # 2" and she would be it.

On the way home we decided to name her Pearl.

This is Pearly on the way home.  

 
That Christmas was extra special because we had Pearl with us. Jeremy and she became instant best buddies.


 No one plays "tug rope" like Jeremy does.


And somebody was done for right from the beggining...


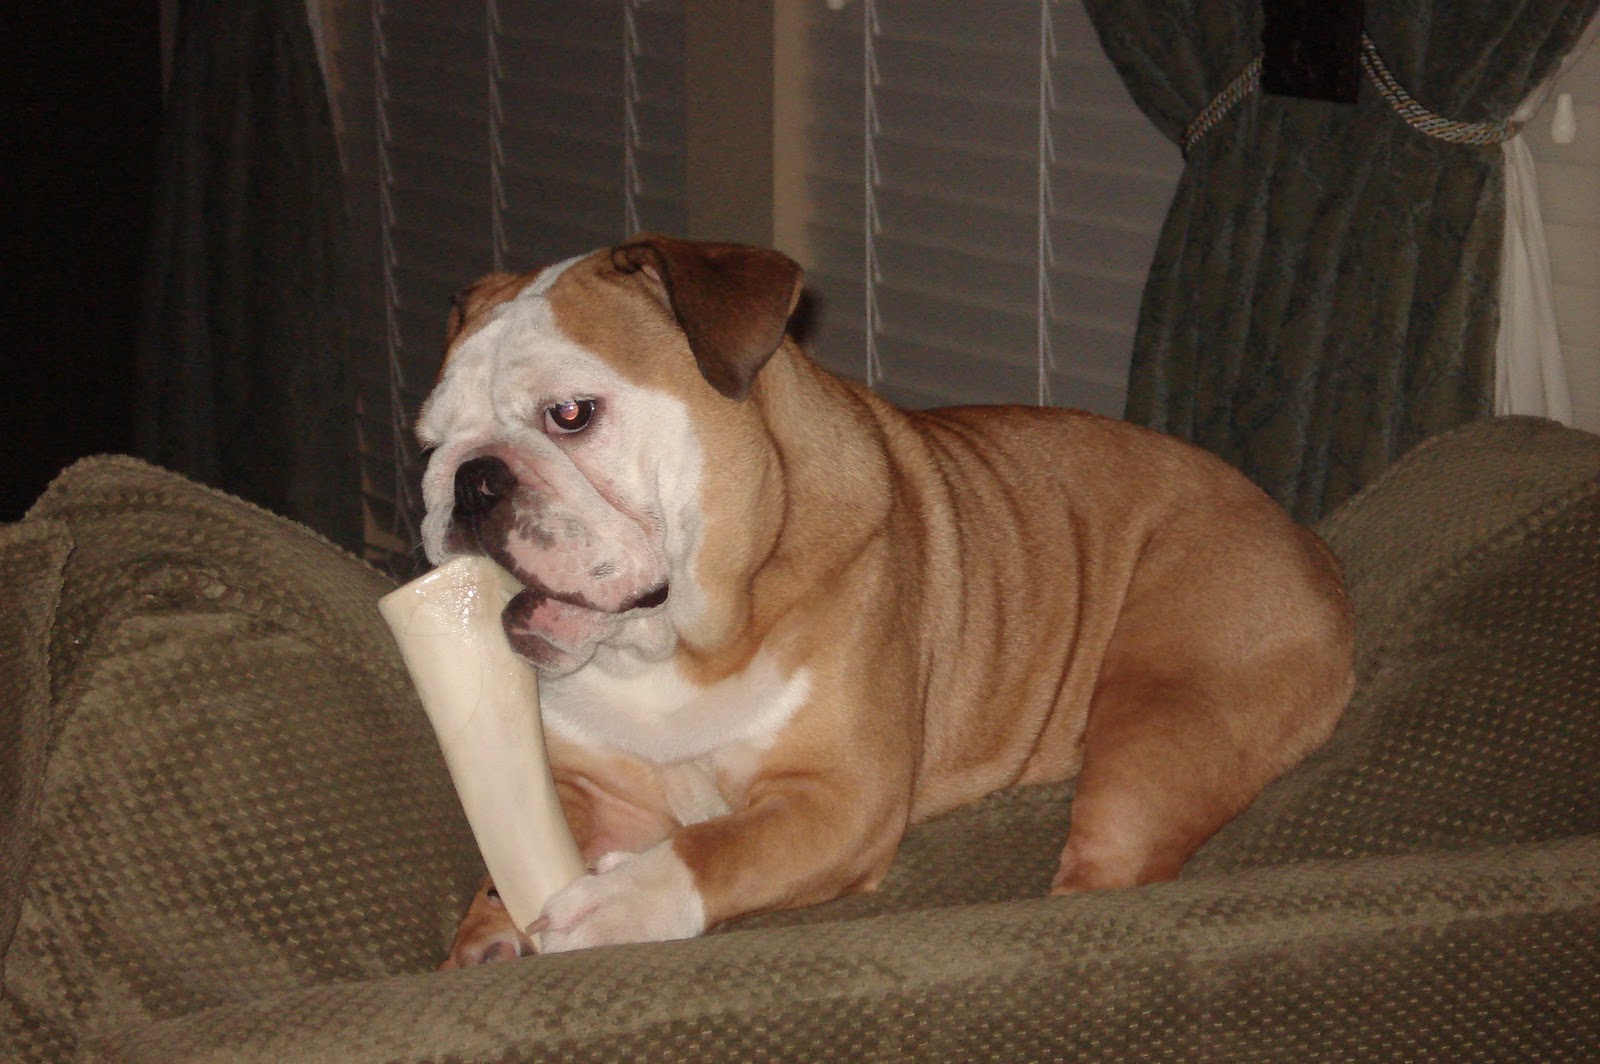
And Pearly has grown a lot. She has such a personality! She's fussy, she snores, she farts.  


She looks grumpy most of the time but in reality she's just a goof ball and a big softie.


She will lick you to death if you let her and bark at you if you are not paying her any attention.


She loves chewing on her bone and "helping" Jeremy cook.


Doing laundry has never been the same again since we got her.


I just know that no matter what happens during the day, I have these two to look forward to at night - and that makes it all worth it.


My two grumpies. They will never smile for pictures =) 

I love you!

Vintage Linen Napkins

Some long while ago, Jeremy, Debbie and I attended an auction in a small town, somewhere in the hill country in Texas - can't remember the name of the town now...

Jeremy and I came back with two couches, a chair, one chandelier, a desk (which it has been refinished and it is now in our office - need to post about it later) and two boxes of vintage linens! 

We got both boxes for $10 - what a steal!  I wish I had taken better pictures of all the linens in the boxes. 

The ones I could not do without have been washed and ironed and are now safely stored in our china cabinet in the dining room.

Out of two linen table cloths, I made the pink and grey pillows shown in the picture in my earlier post. I also made some linen napkins out of a third linen table cloth and a table runner out of a fourth. 

Below are some pictures of a fifth linen table cloth that was in one of the two boxes. The table cloth had this wonderful, bright blue and green floral pattern along the border that is not all identical but all similar. At first I wasn't too sure what to do with it but since the linen napkins sold so well at the show, linen napkins is what I decided to make out of it! =)

After washed, I cut out 8 squares with as much of the floral pattern in the center as I could get and then I ironed and starched each square.  

With the other napkins, I did a rolled hem. I do not have the rolled hem foot so let me tell you - it was not this easy! Note to self: buy rolled-hem presser foot. =/ wish I had known about it earlier.

Now, with these napkins I am going a different route - a scalloped edge! My trusty Bernina sewing machine does all kinds of stitches and I thought it was about time I gave one of them a try. After all, it gets pretty boring sewing in straight lines all the time.

I lined the edge of the napkin to the edge of the presser foot and started stitching.  

It stiches pretty smoothly and mostly you just have to keep guiding the fabric along and that's all.


The coolest thing was seeing how neat it looked as it is being sewed.


And look who's always around to help me out! :) Please don't mind the evil eyes - Miss Pearl is sweet as can be. The camera phone does not do her justice. :p


And here are some that are finished. Once done, all you do is trim the edges.  I will post pictures of the finished product. I still have 3 left to sew and all still need to be trimmed.

Love,

It's "Official" :)

Wow, where does the time go?
Can't believe last time I wrote a blog post was in June! I keep telling myself I need to do a better job at updating the blog but what do you know? Life always gets in the way.

So what have I been up to these past few months you might ask?

WORK WORK WORK

During this time I have squeezed in two trips to Mexico and one trip to China - a very long trip to China... More on that someday. All three trips were for work which means they were no fun at all.  

I have also been working most Saturdays that by the time Sunday rolls around I'm so pooped I don't want to do anything but lie around in the couch and watch TV. It has become a lazy habbit and I am trying my best to break away from it and start getting things done around the house!!

One major thing however that I did manage to get accomplished was to spend more time creating things with my mother-in-law, Debbie. We have really tried to put things in high gear and make it a top priority to get this little side business going. It is so exciting and such hard work but it is totally worth  it.  That side business is now called "Cherubim Creations" =)


Few months back Debbie heard about the Home for the Holidays Gift Market in Galveston at Moody Gardens.. We decided we would sign up for it and give it a shot!  It really was a great way to have a goal and deadline - we knew the show was coming up so there was no getting around the excused for being too busy. 


Here are some pictures of our booth at the show:
Stockings
   
Christmas Angels

Stenciled 1776 Pillow and Americana Pillows

Vintage Linens, Hand Embroidered Towels and Crochet
 
Stenciled Pillows
 
Pillows Made out of Vintage Linens

Our booth set up the first two days


The show was definitely a learning experience and Debbie and I have found out that for now we should probably stick with the smaller gift markets held in places like churches and small towns.  We meet great people and got to hear some great advice from some more experienced vendors who have been doing this for a while. 

At this show we were told about the Mary Queen Catholic Church Bazaar in Friendswood and that it was a really great venue for vendors like us. It took place the following weekend so Debbie and I hurried and signed up for it.  Confirming our thoughts, the Christmas Bazaar was a much better fit for us.  We had lots of fun and did a lot better in a smaller venue. 

Now Debbie and I are looking for our next venue and continue to work on our inventory.

I have a few things going at the moment...
We are now also "official" with our very own Facebook page!!:)
Check us out here and stay tuned for more updates. 

Love,  

Rooster Towels

On Monday I stayed home.  We had a very busy weekend and I just couldn't pull myself together enough to get motivated for another long day at work.

It was wonderful!! It also amazed me how much I could get done if I stayed home all the time.  I guess it would probably get old after a while, but since that is not the case right now I really enjoy it.   I did some laundry, organized and began some new projects!! This just to add to my constantly growing WIP pile, but hey it was fun :)

I went to Hobby Lobby for a little inspiration and found these really neat stencil cutouts of ROOSTERS!   I've been having this rooster obsession for a while now... started last year when we got these glass roosters at an auction in Rosenberg. Then a while later, I went to the Houston Quilt Show with my mother-in-law and a friend where I found these super cute rooster fabric that I made into a hanging quilt. 


Unfotunately, this is the only picture I have of it. I took it with my phone so it's not the best quality but you get the idea. This sits over the fridge.

For Christmas, that same friend, bought me a rooster ornament and a rooster cutting board! She's the sweetest lady.  

I guess you could say our kitchen has a rooster theme to it now.

I digress... back to Hobby Lobby and the rooster stencils.  


I found this stencil and I thought it would just be perfect to go along in the kitchen. I got me some paint and brush and went home ready for some DIY craft!


I plan to cover-up the purple stripe with some super cute trim that will add more of a country theme to it.


I thought about getting new kitchen towels but then decided to go along with what I have. The kitchen towels we have now are at least an year old - they have stains and tears and wear to them. I convinced myself there was some charm to it. Jeremy is always telling me how things don't have to look perfect or look like a page out of a catalog - afterall this is our home and we live in it: kitchen towels will get used and will get dirty. It is OK and I will survive.  :)

 
Here's my assembly of towels. I have more towels to stencil but I think I will do them in a different color this time. Maybe a red, brown or green?  I can't decide.


The towels are drying - per the isntructions they have to dry 48 hrs.  I hate the wait!! I'm washing them tonight and hope to add the trim to them by the end of the week.  Can't wait to see what they will look like in the end!

Happy Hump Day everyone! :)


Bathroom Redo

WOW!  It's been almost a year since I last wrote a post.  How time flies... I can't say that much has happened during this time, other than work work work. 

It does seem though that during this time all creativity and desire to do anything around the house went away.  It is especially difficult to work on projects when you come home from work exhausted and just want to crawl into bed and rest.   Alas, it is the middle of a new year and I will have no more of it! :)

Few weeks ago, Jeremy and I decided to redo our bathroom. It just seemed that one day we looked around us and everything was BEIGE. How unispiring. 

The bathroom has always been a room that I struggled with figuring out what to do.  Motivated by the many epeisodes we watched on DIY and HGTV, especially Sarah Richardson's show, we decided to brighten the room significantly.

Here are some pictures of the before: boring beige galore!


Don't mind the mess... we had just begun to get our tools together to begin our mini renovation.


Beige walls, light beige cabinets doors and trim, and beige tile. I guess you could call the cabinets, trim and door colors a cream color, but that much of it all together just blends in and looks beige.


Jeremy and our assitant Pearl.  She's the sweetest puppy in this whole world (another post on her later) and of course she can't miss any of the action.  We had to put her up later so we could actually get some work done.


And more beige... you get the idea. It was preety miserable.


So in our efforts to brighten up the room and to keep a somewhat 'country' theme, we decided to add beadboards to the wall.


Here are some pictures of the process:


As you can see, we added new, thick baseboard which I love and we also have added a trim piece above the beadboard (I just don't have a picture of it).  It was amazing how much brighter and light the room felt after just adding the beadboard.  You can see on the first picture, our paint samples.   The room is now almost complete - minus a few decorations here and there, and towel hooks, etc. 

A post will follow with pictures of the finished product!


Bean Bags


I know I still haven't updated everyone on the exciting new creations that have been happening, but it's been so busy with work, this and the other that there's been no time =(

But today, I'm taking a break during lunch to update y'all on a little project that I started and FINISHED!!!

My niece turned 1 back in May and I had no idea what to get her... You see, I'm not sure what you give a 1 year old. My sister is the only person with a baby in my life right now - I just haven't been around children that much to know what to give for gifts...

But Cheryl from one of my favorite blogs has written about making bean bags as gifts for children. I thought "Oh how fun!!" This would be something that I would enjoy making and hopefully my niece would enjoy having it too.

So following most of Cheryl's instructions and tweeking here and there to fit the idea I had in my mind, I began this little project. :)

A while back I had written about all this wonderful fabric I had received from my mother-in-law. I scavanged through it all and found all the pink and girly fabric I could find and cut 6.5" squares. This is what I came up with...


I decided I would spell out her name - one letter in each bag. So I traced the letters on freezer paper and ironed that on the fabric. This makes it so much easier to cut out the letter.


Once the letters were cut out, I peeled the back side of the freezer paper and ironed the letter on the fabric.  * I took the pictures at night so the colors are a little off and the quality is not the best =/ But I think you can get the idea :)


I then thought I would add a border around the edges of the letter so 1) the fabric wouldn't fray and 2) it would give it a more finished look.

So I just did simple blanket sitches around eache letter in three different colors: yellow, pink and green. I just used some cross-stitch floss I already had avaible.


Then, placing right side to right side I sewed together two squares (front and back) leaving an opening so that the beans can be poured through later. You can tell my beginner's level sewing by the number of pins I use to keep the two fabrics straight :$ I'm obssessed with having th edges match up and I use as many pins as I think necessary - often it doesn't help but it's not for lack of trying! :)


After cutting the corners a little, I turned each back right side out.


To stuff the bean bags I used everything we had available at the house - white hominy corn, beans, peas and lentils! It took a lot more "filling" than I thought it would. Thankfully we had enough. I filled each bean bag about halfway. And Voila!! This was a super fun project and the idea is simple enough that you can personalize it to your own taste!

I hope my niece enjoys these as much as I enjoyed making them!


You Might Also Like

Related Posts with Thumbnails